It’s that time of year again. Our gardens are starting to overflow with all of the fruits and vegetables we so carefully planted in the spring (which seems like it was just yesterday, doesn’t it?). If your garden looks anything like mine does, you’re probably having the same thoughts as me right about now: How on earth am I going to be able to use all of these before they go bad? There are only so many loaves of zucchini bread that I can give away (this year I have a lot of zucchini).
This brings us to freezing (or canning, but who really has all that free time and patience?). It took me a bit of trial and error to figure out how to freeze the different types of fruits and vegetables without them turning into a block of ice or looking so inedible that I wasn’t even willing to try them out. I figure that by filling you in on what I’ve learned over the last couple of years, I could save you time, headaches, and wasted food.
These directions are laid out in a way that optimizes my time management, but you can always adapt it to suit your individual needs.
What You Need
- Freezer tape.
- A marker.
- Freezer bags (good quality ones – It’s worth the investment).
- A baking sheet (or three; work with what you’ve got).
- Parchment paper.
- Rigid plastic containers (if you’re going to be freezing fruit or anything with a lot of liquid like sauce, jam, salsa, etc.).
- Enough empty freezer space for the baking sheet(s) to fit in.
- Heavy-duty aluminum foil.
- Freezer paper.
The last two you probably won’t need if you’re planning to use your frozen fruits and veggies within a few months, but if you’re planning to freeze them long-term—anything over six months—the foil and freezer paper are definitely must-have items.
How to Freeze Your Produce
Step One – Make sure that you wash all of your fruits and vegetables incredibly well, especially if you’re not planning to peel them, to ensure that you get any surface microorganisms.
Step Two – Pat those fruits and vegetables as dry as possible (using a clean dishtowel or paper towel).

Step Three – Put the fruits and vegetables you plan to freeze whole on a baking sheet in a single layer. There are actually quite a few types that do exceptionally well-frozen whole, such as berries, bananas, chili peppers, beans, asparagus, and corn. Ensure you line the baking sheet with parchment paper before you put your produce on it to avoid it freezing to the sheet.
Step Four – Stick the baking sheet(s) in the freezer for at least fifteen minutes (although longer is better) to flash freeze them. The more spaced out the produce is, the more quickly it will freeze. Also, try not to open the freezer during this time (you probably won’t have to worry about it you’ll be plenty busy doing other things).
Step Five – Cut up any produce you have that needs to be cut up. This includes bell peppers, avocado, mango, melon, peas, carrots, cauliflower, broccoli, apples, squash (both summer and winter), and stone fruits like peaches and nectarines. Broccoli and cauliflower can be cut into florets; peas can be shelled, the ends of beans (and asparagus if you’d like) off and diced to whatever size you’d like (unless you prefer to cook them whole). Rhubarb can also be frozen if you cut off the woody ends and chop it into pieces. Bananas can be peeled and chopped, but they do equally well when frozen whole in their peels

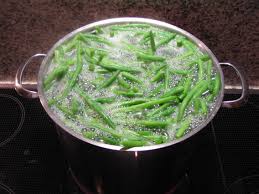
Step Six – Blanch any vegetables that need it. Why? Blanching can help you avoid discoloration and mushiness, and it also helps the vegetables maintain their color and nutrients. Vegetables that don’t need to be blanched are corn, onions, potatoes (including sweet potatoes), winter squash, or fruits. Tomatoes don’t need to be either, but I find that it helps greatly when peeling the skin off of them. If you won’t peel them, you don’t need to bother.
Step Seven – Remove the first batch of produce from the freezer (which should be pretty much frozen by now) and stick them in freezer bags. Push as much air as you possibly can out of the bags (a straw works well) and seal them up tight. Slap some freezer tape on those bags and label what’s in them (this is important because no matter how good you think your memory is, I promise you you’ll forget what you have in them within a couple of months, especially if you have a lot of produce that’s the same color). Put the parchment paper back on the baking sheets and replace it with more produce; put the sheets back in the freezer.

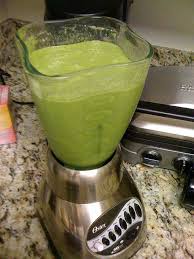
Step Eight – Cook your leafy greens. You don’t have to, but if you do, it’ll end up saving you a ton of space. If you’re a daily smoothie drinker, I strongly suggest making yourself some leafy green ice cubes to add to them – All you need to do it put a bunch of leafy greens in a blender and add enough water to give it a puree texture; then pour the mixture into an ice cube tray and freeze.
Step Nine – If you’re going to be freezing fruits that tend to turn brown once they’ve been cut open (think apples, peaches, nectarines, avocados, etc.), you might want to consider treating them with ascorbic acid and water or lemon juice and water first to prevent that discoloration (1/2tsp of acid to 3Tbsp of water or 1Tbsp lemon juice and 4 cups of water).
Dip your fruit in the solution or sprinkle it over the fruit and let it dry. You could also opt to freeze the fruit in a plastic tub with the same simple syrup that you’d use when canning (I like this method better, personally). If you’ve never canned before, you can find 3 different syrup recipes here (about halfway down the page).
Step Ten: Repeat step seven if you need to. This is also where I make my sauces, soups, stews, and salsas. Then I let them cool a little before putting them all in the plastic containers, closing them tightly, and labeling them carefully (remember to leave some room in the containers for the liquid to expand as it freezes). Running the tape right around the seam of the container helps keep air out and prevent hoar frost. I strongly recommend using freezer tape because it tends to hold up better with the cold temperatures and moisture, but if you don’t have any on hand, whatever you have will probably hold up until you can get to the store. Furthermore, wrapping anything that you will be freezing for more than six months in freezer paper and/or aluminum foil will also help you keep everything as fresh as possible.
***Apparently potatoes and Zucchini can be shredded and frozen (think hashbrowns). Still, I’ve never actually tried to do it myself (we usually go through potatoes pretty quickly, and I bake a loaf of zucchini bread for every single person I know).
And that’s it! It might seem like a lot of work, but it doesn’t take all that long at all (especially if you happen to have kids that you can recruit for the bagging process; they love to suck the air out of the bags). While it’s true that fresh is best, frozen comes in a close second, especially when the produce comes out of your garden instead of from another country.
